Quick Start Guide – Excel Add-In
von Jan-Philipp Kalus (Netzhirsch)
Download Installer
Download the Installer Tool from here, enter your contact information and click the “Request free Download” button. After filling out the contact form you will receive an email with the download link and further information. Save the Add-In in any folder and execute the installer.
Follow the instructions on your screen.
Note: You need administration rights to install the required .NET 6 framework.
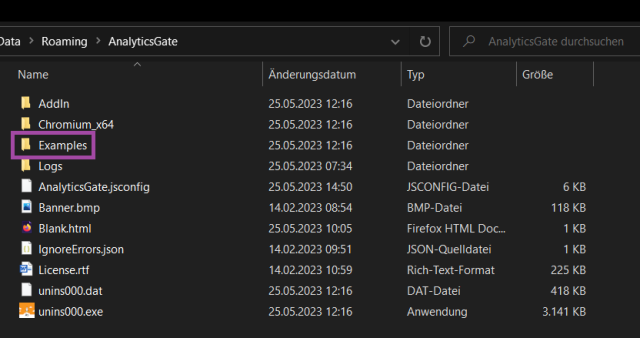
Open Examples
In the installation directory “C:\Users\<YourUser>\AppData\Roaming\AnalyticsGate” you will find some templates that you can open and test in Excel.
Add a Security Rule
In order for AnalyticsGate to have access to your licence, you must create a security rule. We match the AnalyticsGate license with your Qlick Sense serial number. This rule allows us to read this serial number to do the matching.
| Setting | Value |
|---|---|
|
Name
|
AG_License
|
|
Resource filter
|
License_*
|
|
Conditions
|
!user.IsAnonymous()
|
|
Context
|
Both in hub and QMC
|
Add License to Content Libraries
Upload the AnalyticsGate license file “license.txt” to your Qlik Sense Server and create a new content library “analyticsgate”
This content library will hold the file “license.txt” on your Qlik Sense server.
Go to https://your-qlik-sense-server.com/qmc >> Content libraries
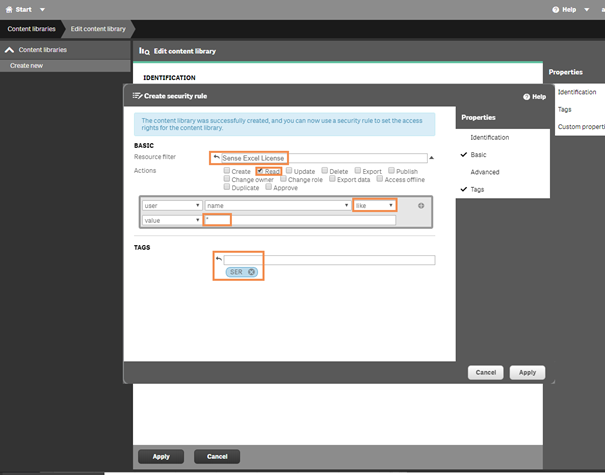
Add a Security Rule for the “AnalyticsGate License”
You should create a security rule to read the license.
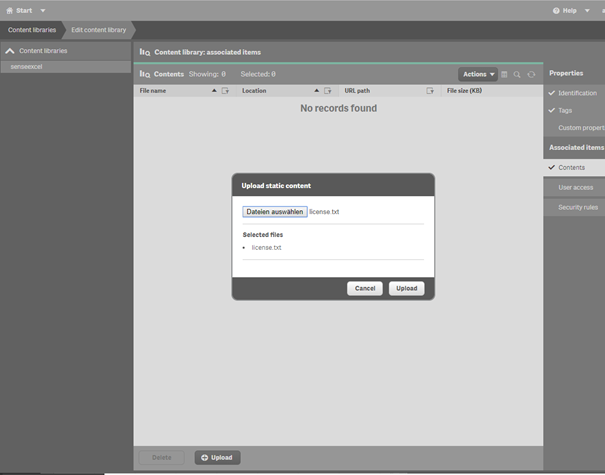
Upload your file “license.txt” to the content library “analyticsgate”
To get a quicker overview of your licence information, you can install the Qlik extension AG Web Management at the following link.
Allocate the User
If you have installed the “SMC” you can allocate users in a very easy way.
If you want to limit the user usage time you can enter a start date in “Activated From” and an end date in “Activated Until”.


